
In this tutorial, we’re going to review one way to setup IntelliJ for Scala and Spark development. The IntelliJ Scala combination is the best, free setup for Scala and Spark development. And I have nothing against ScalaIDE (Eclipse for Scala) or using editors such as Sublime. I switched from Eclipse years ago and haven’t looked back. I’ve also sincerely tried to follow the Pragmatic Programmer suggestion of using one editor (IDE), but I keep coming back to IntelliJ when doing JVM-based development.
But, you probably don’t really care about all my history, though. Let’s get back to you. You’re here to setup IntelliJ with Scala and hopefully use it with Spark, right?
Table of Contents
IntelliJ Scala and Spark Setup Overview
In this tutorial, we’re going to try to go fast with lots of screenshots. If you have questions or comments on how to improve, let me know.
After you complete this Spark with IntelliJ tutorial, I know you’ll find the Spark Debug in IntelliJ tutorial helpful as well.
Assumptions
I’m going to make assumptions about you in this post.
- You are not a newbie to programming and computers. You know how to download and install software.
- You might need to update these instructions for your environment. YMMV. I’m not going to cover every nuance between Linux, OS X and Windows. And no, I’m not going to cover SunOS vs Solaris for you old timers like me.
- You will speak up if you have questions or suggestions on how to improve. There should be a comments section at the bottom of this post.
- You’re a fairly nice person who appreciates a variety of joke formats now and again.
If you have any issues or concerns with these assumptions, please leave now. It will be better for both of us.
Prerequisites
- Java 8 installed
- IntelliJ Community Edition Downloaded https://www.jetbrains.com/idea/download/ and extracted (unzipped, untarred, exploded, whatever you call it.)
Configuration Steps
- Start IntelliJ for first time
- Install Scala plugin
- Create New Project for Scala Spark development
- Scala Smoketest. Create and run Scala HelloMundo program
- Scala Spark Smoketest. Create and run a Scala Spark program
- Eat, drink and be merry
Ok, let’s go.
1. Start IntelliJ for first time
Is this your first time running IntelliJ? If so, start here. Otherwise, move to #2.
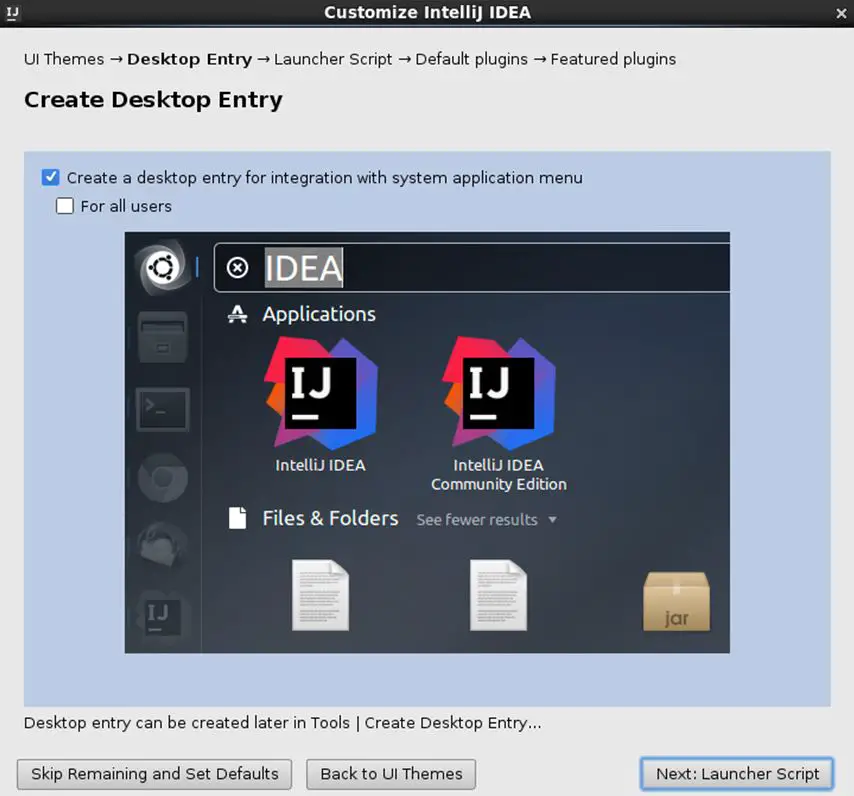
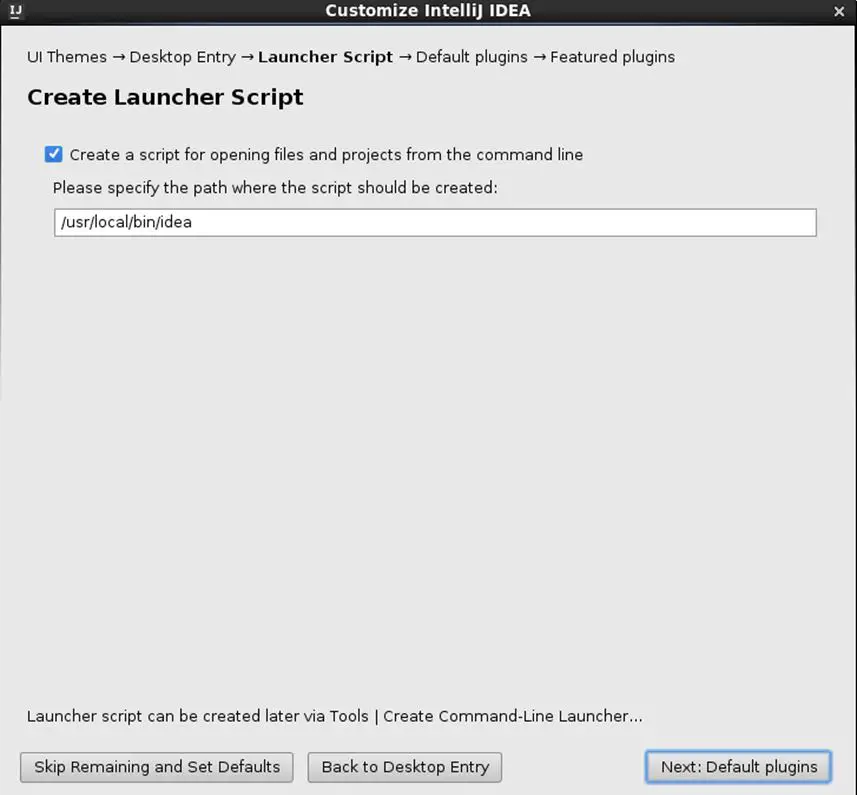
When you start IntelliJ for the first time, it will guide you through a series of screens similar to the following.
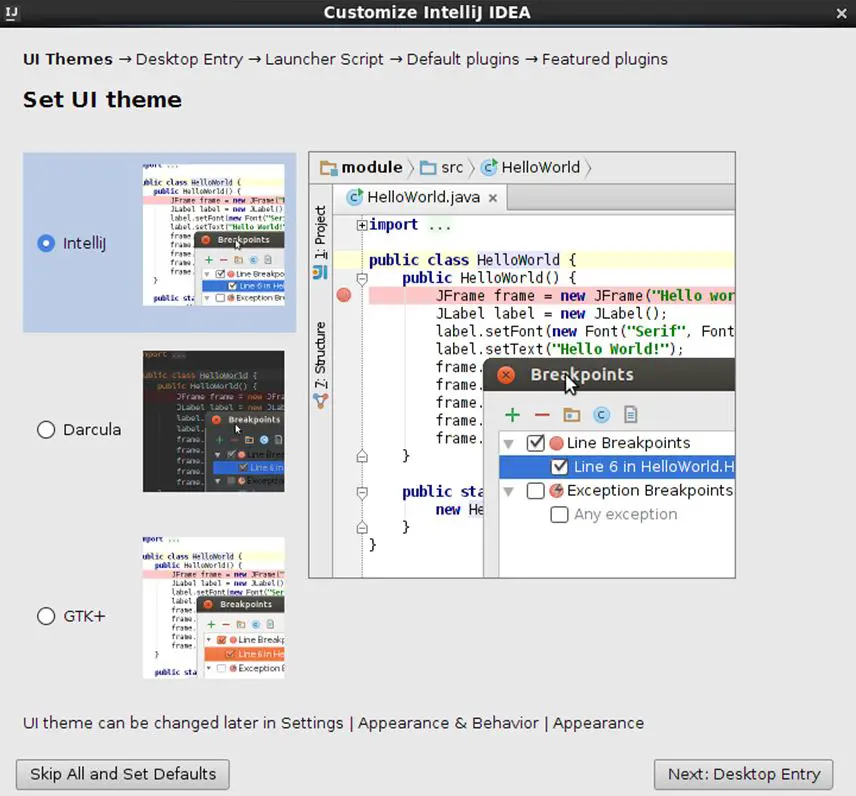
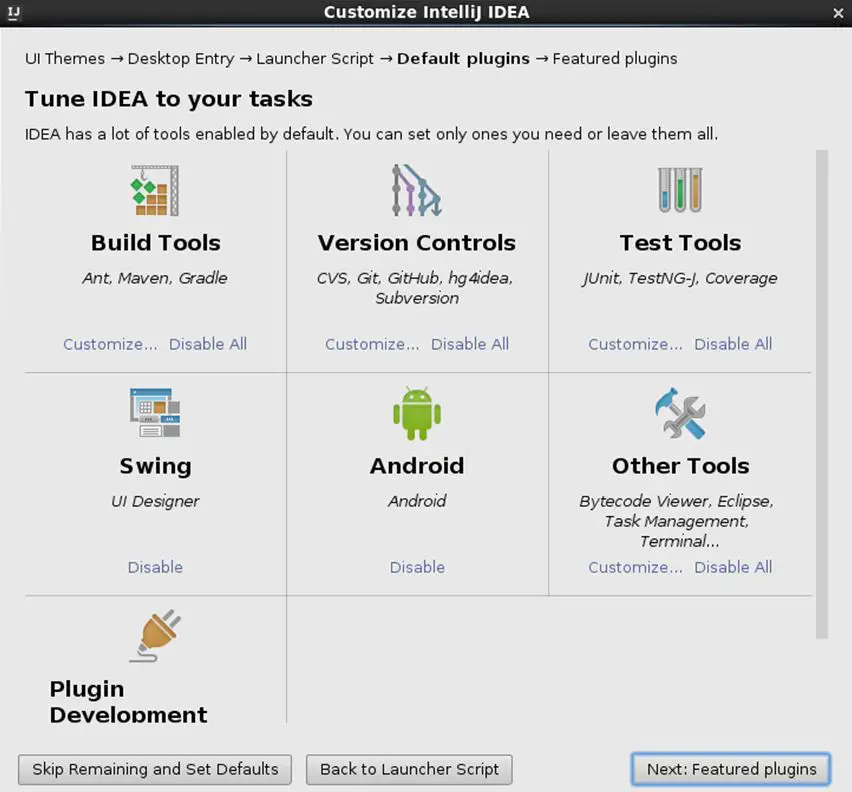
At one point, you will be asked if you would like to install the Scala plugin from “Featured” plugins screen such as this:
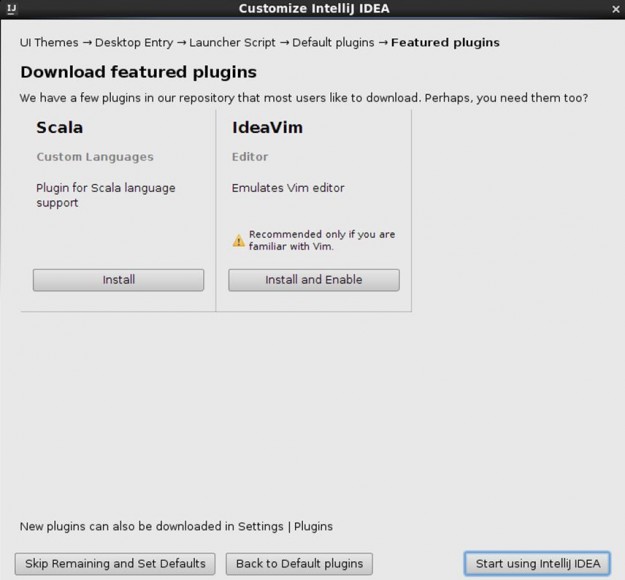
Do that. Click Install to install the Scala plugin.
2. Install Scala plugin
If this is not the first time, you’ve launched IntelliJ and you do not have the Scala plugin installed, then stay here. To install the Scala plugin, here’s a screencast how to do it from a Mac. (Note: I already have it installed, so you need to check the box)
3. Create New Project for Scala Spark development
Ok, we want to create a super simple project to make sure we are on the right course. Here’s a screencast of me being on the correct course for Scala Intellij projects
4. Create and Run Scala HelloMundo program
Well, nothing to see here. Take a break if you want. We are halfway home. See the screencast in the previous step. That’s it, because we ran the HelloMundo code in that screencast already.
5. Create and Run Scala Spark program
Let’s create another Scala object and add some Spark API calls to it. Again, let’s make this as simple (AKA: KISS principle) as possible to make sure we are on the correct course. In this step, we create a new Scala object and import Spark jars as library dependencies in IntelliJ. Everything doesn’t run perfectly, so watch how to address it in the video. Oooh, we’re talking bigtime drama here people. Hold on.
Here’s a screencast
Did I surprise with the Scala 2.11 vs. Scala 2.10 snafu? I don’t mean to mess with you. Just trying to keep it interesting. Check out the other Spark tutorials on this site or Spark with Scala course on where I deal with this fairly common scenario in much more detail. This is a post about Intellij Scala and Spark.
Notice how I’m showing that I have a Standalone Spark cluster running. You need to have one running in order for this Spark Scala example to run correctly. See Standalone Spark cluster if need some help with this setup.
Code for the Scala Spark program
import org.apache.spark.SparkContext
import org.apache.spark.SparkConf

/**
  * Created by toddmcgrath on 6/15/16.
  */
object SimpleScalaSpark {

  def main(args: Array[String]) {
    val logFile = "/Users/toddmcgrath/Development/spark-1.6.1-bin-hadoop2.4/README.md" // Should be some file on your system
    val conf = new SparkConf().setAppName("Simple Application").setMaster("local[*]")
    val sc = new SparkContext(conf)
    val logData = sc.textFile(logFile, 2).cache()
    val numAs = logData.filter(line => line.contains("a")).count()
    val numBs = logData.filter(line => line.contains("b")).count()
    println("Lines with a: %s, Lines with b: %s".format(numAs, numBs))
  }

}
6. Intellij Scala Spark Conclusion
You’re now set. Next step for you might be adding SBT into the mix. But, for now, let’s just enjoy this moment. You just completed Spark with Scala in IntelliJ.
If you have suggestions on how to improve this tutorial or any other feedback or ideas, let me know in the comments below.
IntelliJ Scala Spark Additional Resources
As mentioned above, don’t forget about the next tutorial How to Debug Scala Spark in IntelliJ.
This video is too good and helped me gain a lot of confidence .. but i was also looking for just another step of using SBT with it. Actual problem comes in when spark pulls in scala 2.10 and it contradicts the higher versions which are installed
great tutorial!
Extremely helpful Step by Step tutorial to setup IntelliJ with Spark 1.6.1. I was up and running in less than 10 minutes.
Thanks a bunch Todd.
How to add import in intellij ide for example (org.apache.spark.conf).Could you please share about this. thank you
Great tutorial !!!
Could you please teach the spark2.2.0 sbt version in intelliji idea?.we need to add the correct dependencies for all the spark libraries (core,sql,streaming,machine learning,graphx)
Keep an eye on https://github.com/tmcgrath/spark-2
You should be able to update the build.sbt file for spark 2.2
Hi Todd
It is a nice tutorial. But I get the following error when I run the code
Exception in thread “main” java.lang.NoClassDefFoundError: org/apache/hadoop/fs/FSDataInputStream
at org.apache.spark.SparkConf.loadFromSystemProperties(SparkConf.scala:73)
at org.apache.spark.SparkConf.(SparkConf.scala:68)
at org.apache.spark.SparkConf.(SparkConf.scala:55)
at PageRankGraphx$.main(PageRankGraphx.scala:9)
at PageRankGraphx.main(PageRankGraphx.scala)
Caused by: java.lang.ClassNotFoundException: org.apache.hadoop.fs.FSDataInputStream
at java.net.URLClassLoader.findClass(URLClassLoader.java:381)
at java.lang.ClassLoader.loadClass(ClassLoader.java:424)
at sun.misc.Launcher$AppClassLoader.loadClass(Launcher.java:335)
at java.lang.ClassLoader.loadClass(ClassLoader.java:357)
… 5 morea
Can you please help regarding this ?
Well, I guess your PageRankGraphx is attempting to load from HDFS. Did you download Spark pre-built with Hadoop? Anything from this SO post help? https://stackoverflow.com/questions/30906412/noclassdeffounderror-com-apache-hadoop-fs-fsdatainputstream-when-execute-spark-s
Thanks for your response Todd.
I used SBT for building and was able to get rid of the problem.
Also i discovered on the way that that the .sh file you have mentioned in the SO answer is only recognized by spark submit and not intellij
Todd, excellent one. Thank you.
Hi,
Excellent article. I followed the steps but I am still getting below error:
2019-08-24 00:46:27 ERROR SparkContext:91 – Error initializing SparkContext.
java.lang.IllegalArgumentException: System memory 259522560 must be at least 471859200. Please increase heap size using the –driver-memory option or spark.driver.memory in Spark configuration.
at org.apache.spark.memory.UnifiedMemoryManager$.getMaxMemory(UnifiedMemoryManager.scala:217)
at org.apache.spark.memory.UnifiedMemoryManager$.apply(UnifiedMemoryManager.scala:199)
at org.apache.spark.SparkEnv$.create(SparkEnv.scala:330)
Can you please help on this?